
In this article, I am going to tell you how to do Ender 5 & 5 pro cable management beautifully. Although the Ender 5 series itself is a very clean and organised design, there are still a few things that have to be taken care of.
When it comes to managing cables, Ender 5 and 5 Pro are only different in size, so you can use the same technique to manage both.
Problem 1:
As you start some big prints on this machine, you will realise that there is a problem with X axis stepper motor cap. The cables going to the heat block are just above the x-axis motor cap, and at times, this cable gets caught in this motor cap. As a result, the printer fails to print. This can result either in breaking of cable or malfunctioning of some parts, so it’s better to fix this issue as soon as possible.

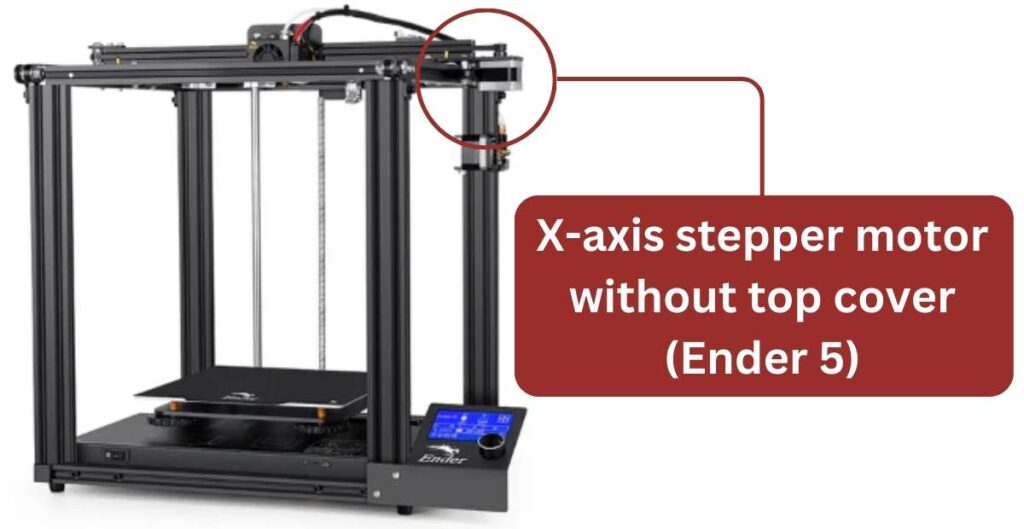
This problem arises due to the attaching of wires going to the heat block and the Bowden tube that carries filament to the heat block. Generally, people zip-tie them together, and then they become heavier and go to the side on the x-axis motor and resist its motion.

Solution:
Do not zip tie these wires and bowden tube together. Use the following steps to organise these wires properly.
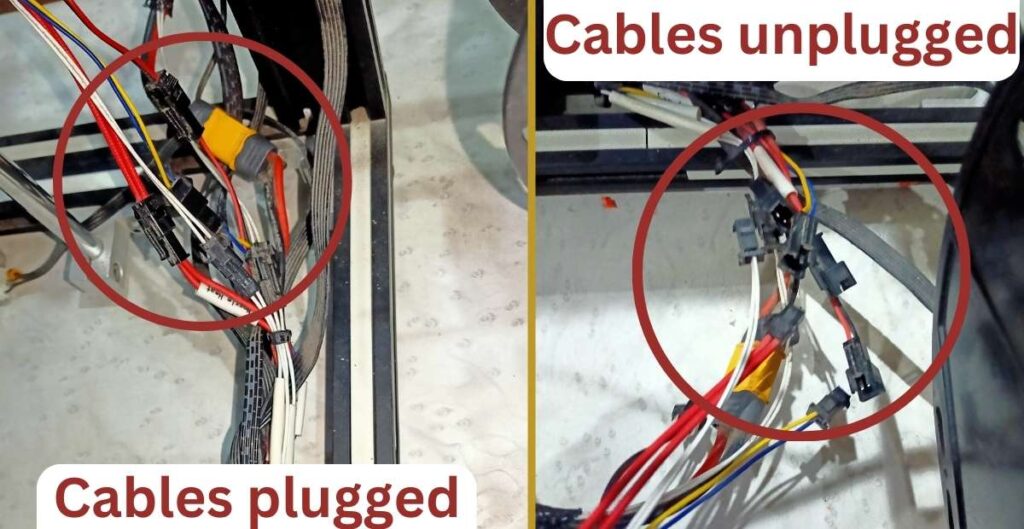
Step 1: Unplug the wires from the JST SM2 connectors.
Step 2: Move the hot end to the extreme x & y positions, as shown in the picture below. This is in order to confirm that wires are long enough to print even in the extreme portion of the print bed.
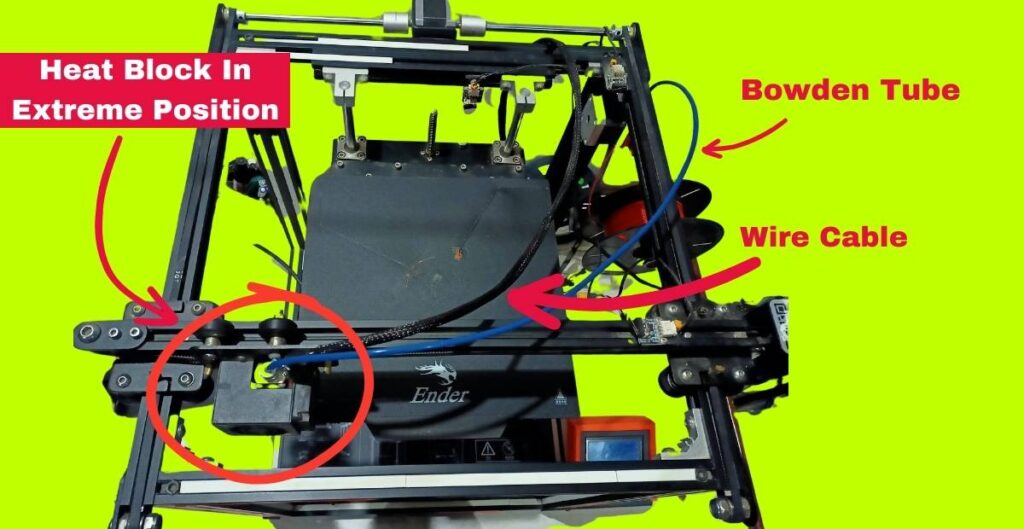
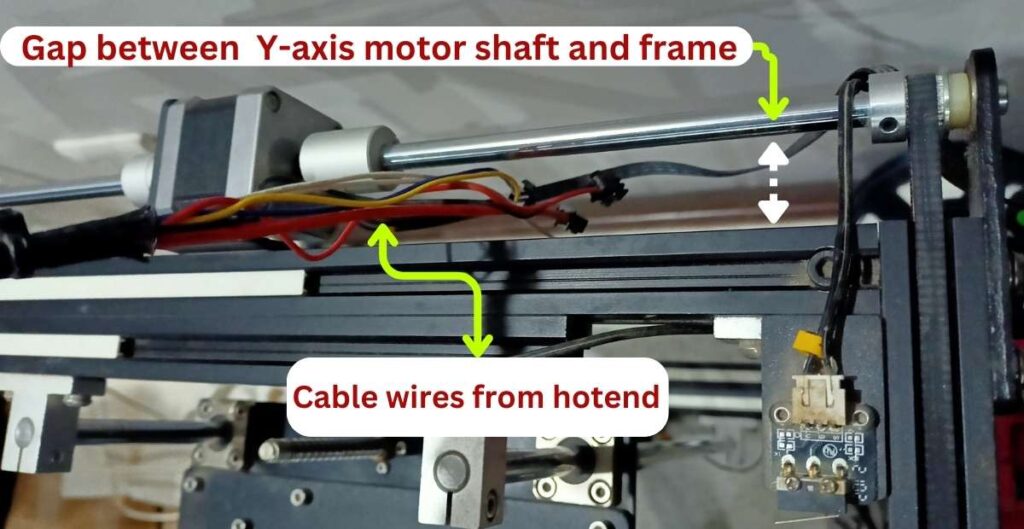
Step 3: Put the wires in between the gap of the y-axis motor shaft and the frame, as shown in the picture below.
Step 4: Now connect the wires again, following the colour code. Bring the heat block again to the home position. You can do it manually without turning on the printer or by using the “auto home” feature of the machine.
If your wires are not long enough, then you can use some extra wires to make them long. You can do it in the following way:
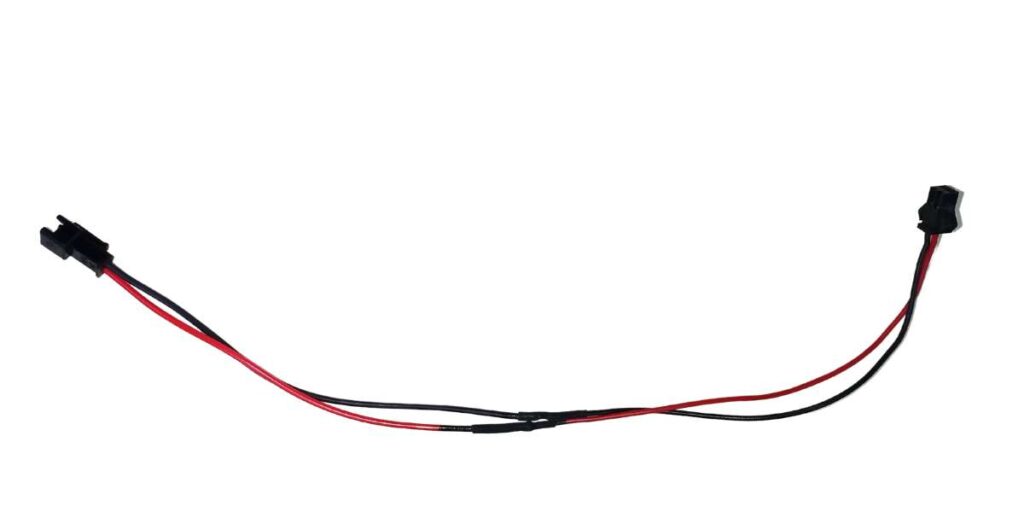
Ender 5 and 5 pro use the JST SM2 connectors to join the wires from the motherboard to the different components/parts. You can get some of these JST SM2 connectors online. These connectors come with 5 to 7cm of wire with each male and female port. (see the picture below)

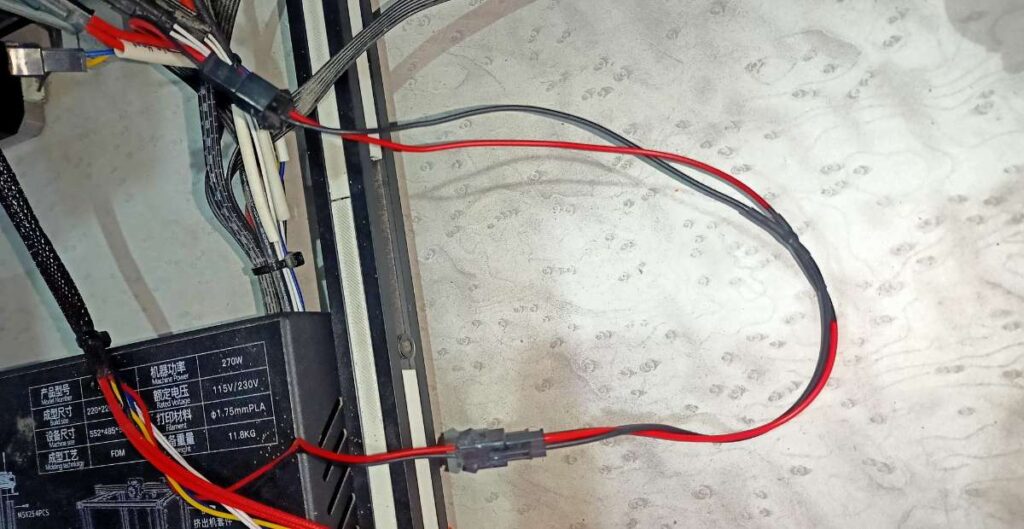
So when you join these wires to each other they will become around 10 to 14 cm long, which is good enough to extend the length. (see the picture below)
Now, just put these extra wires between the motherboard wires and component wires, following the colour code. This will give extra length to the wires so you can easily take the essential steps to organize them properly. (see the picture below)
For bed wires, you have to use other connectors like electrical quick push cable connectors because these wires are thicker than other wires.
Problem 2:
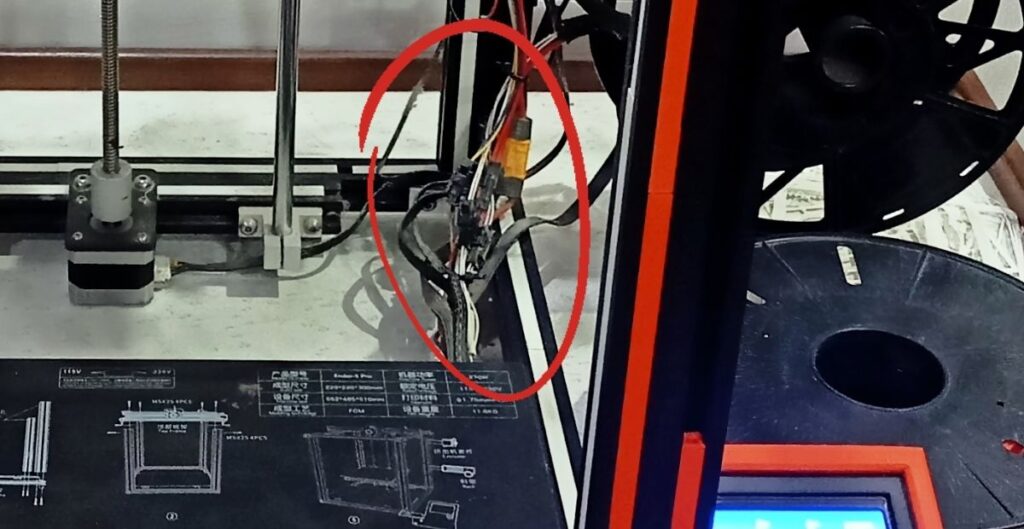
Below is the picture of the cables in my 5 pro 3d printer, and as you can see, they are pretty messed up. Here, all the cables are together, so they look bulky. (see the picture below)
Solution:
To clean this up, the lengthening of wires is essential as they are short for proper placement. I have already told you how to lengthen the wires. You can follow that process to give the wires sufficient length. Also, get some cable ties.
There are a total of eight pairs of wires – three pairs for the endstops, four wires for stepper motors, and one pair for the heated bed. Now we have to organise all these wires so that the machine looks clean.
Take all three wire pairs going to endstops and tie them together to the frame right next to them. Do the same with four wires going to stepper motors and bed wires. This way, these wires will not be visible separately.
In the same way, tie the wires going up with the vertical column of the frame. But for the bed wires, tie them approximately around the mid-height of the column, as the bed has to go down, too.
Now your machine’s cables are fully organised and properly managed. Enjoy your 3d printing experience.
If you have anything to discuss or tell me, feel free to tell me in the comments section below. You can also give your feedback about the article, whether you liked it or not, down there.
FAQ’s
Is Ender 5 cable management necessary?
Yes. It’s essential to organise your 3d printer’s cable as it makes it better to work on it.
Defects in FDM 3D Printing
3D Printers In Your City:
3D Printing Services In Your City (Prototyping Service):

